Your browser does not support JavaScript!

Inspection of (Sample Aircraft)

for Client
K??? airport (airport ID)


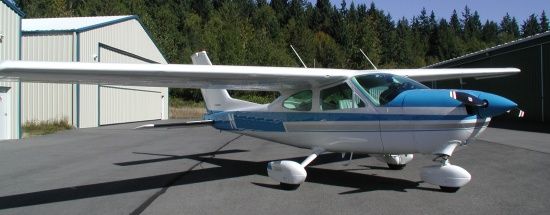
This is a very nice looking '77 FG with a nicely equipped metal panel, a very nice interior, nice paint and clear windows. The radios are King Silver Crown era, capable although not the latest generation.

With an engine overhaul in 1996 and a top overhaul just 15 hours ago, the engine appears strong and ready for a long run from here. The airplane has been flown minimally in recent years but kept in a dry and well enclosed hangar.

The current owner provided an unusual level of documentation including the type, age and status of key accessories on the aircraft and generally displayed a strong passion for caring for the aircraft. All indications are that is has received excellent maintenance.

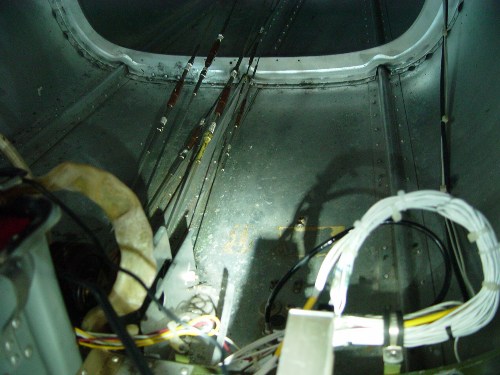
Soundproofing has been installed under the carpet, in the overhead and in the first bay of the tailcone. This is of the 'dense foam' style, a pretty good all-around system. The lead plate has been removed from the top of the tailcone and most likely from the ceiling of the main cabin, reducing the risk of skin corrosion. No corrosion was noted in these areas.

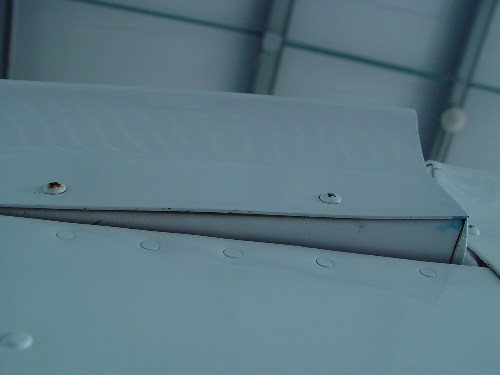
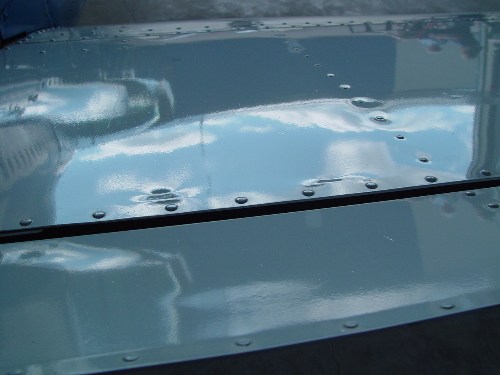
No corrosion was found in the most common locations of the fuselage, nor was filiform corrosion seen in the most common areas of the outside of the aircraft. Slight pitting was noticed in wing inspection panels, typical for an aircraft of this age, suggesting that continued ACF50 or Corrosion X treatments will be valuable to stop further issues.

There have historically been some issues with engine break-in, but with a new top the engine is at a fresh starting point. Past operation was said to be at 23/23 burning 10.6 GPH. I'd suggest a higher power setting and a mixture much closer to peak to keep temps and pressures inside the cylinder up for break-in. Check the CFO site for discussions of proper break-in procedures.

The following specific items should be considered as part of the purchase decision:


Airworthiness issues:
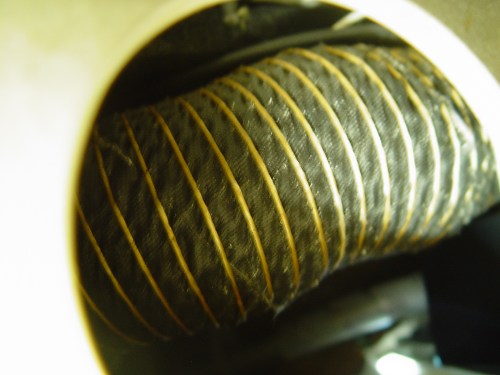
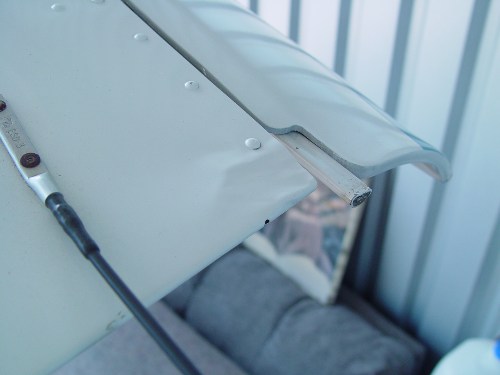
- Flap follower cable is old type, cracking and in need of replacement
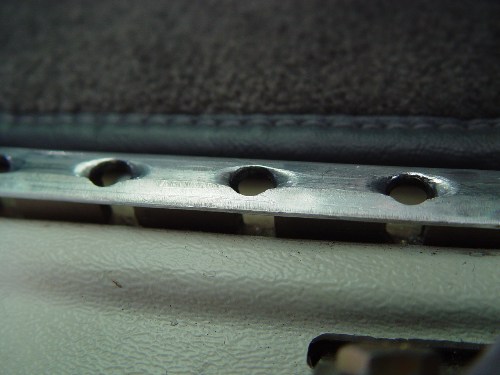
- Far left seat rail out of spec per AD. Other 3 rails are OK

Resolve before purchase (Value impacting)
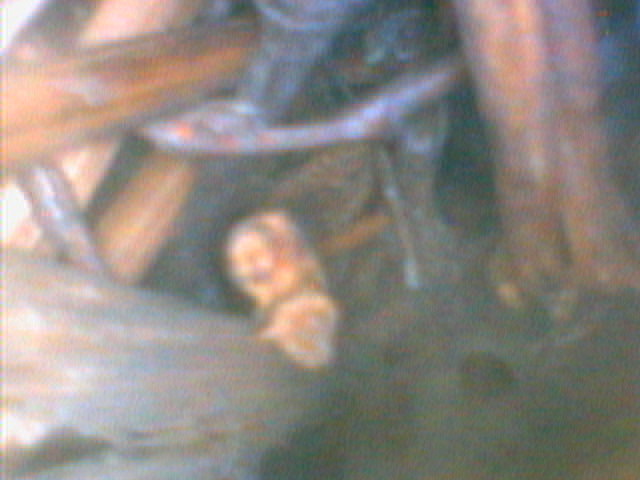
- There is a nest in the stabilator, plan on several hours work to remove but doesn't need to be completed until annual
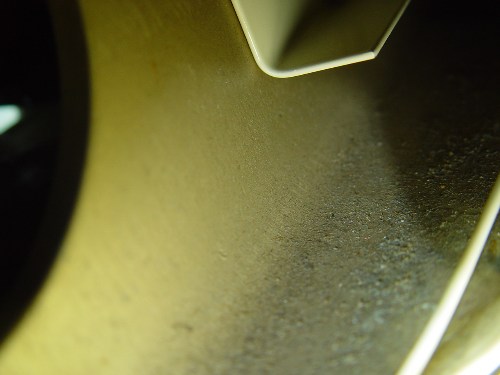
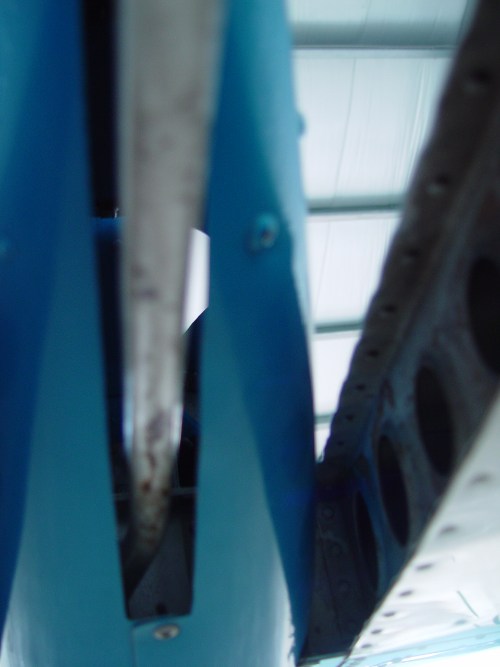
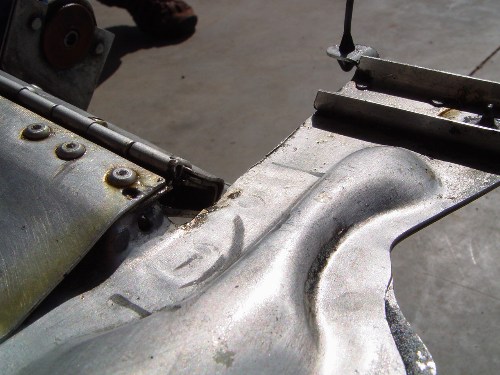
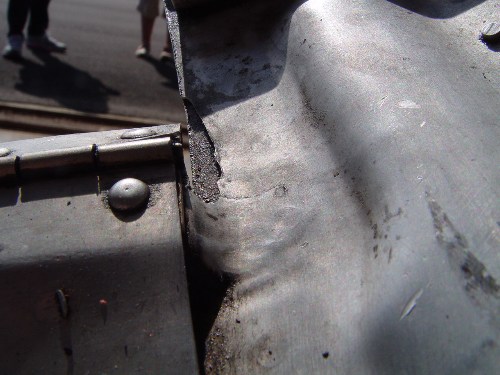
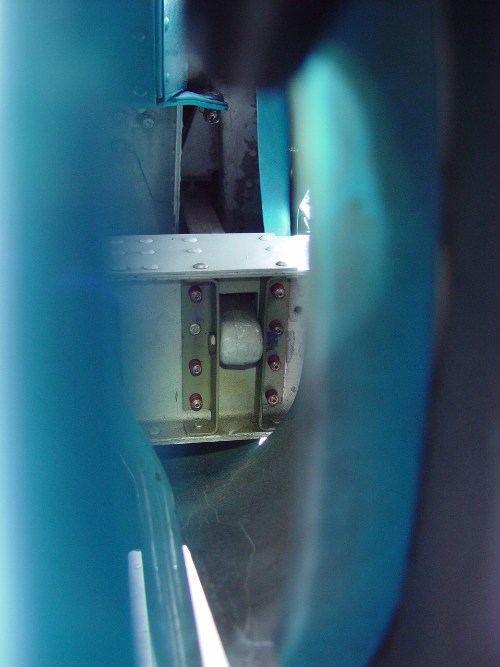
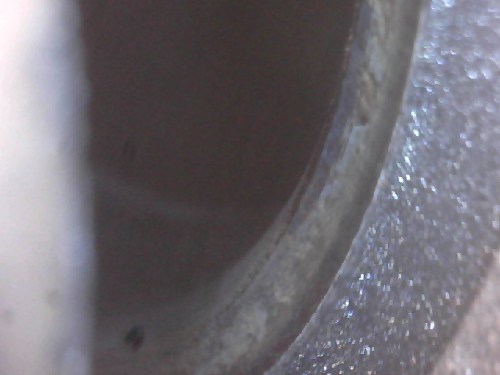
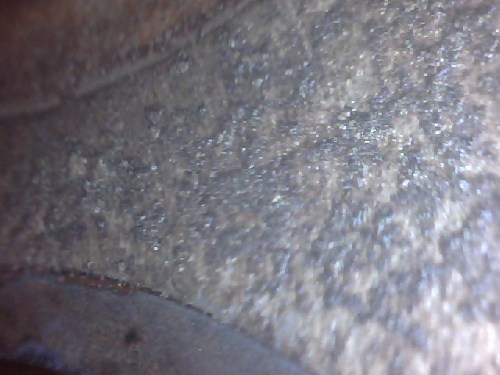
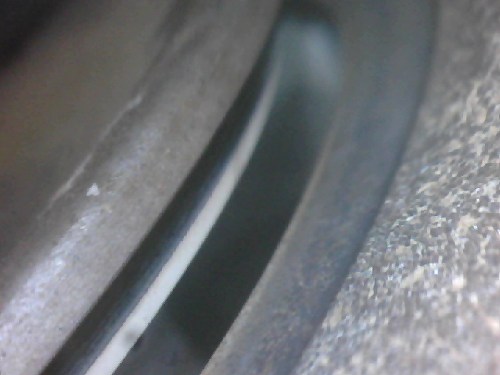
- The spar carrythough is showing some pitting, should be inspected, cleaned, protected with Alodyne then zinc chromate.
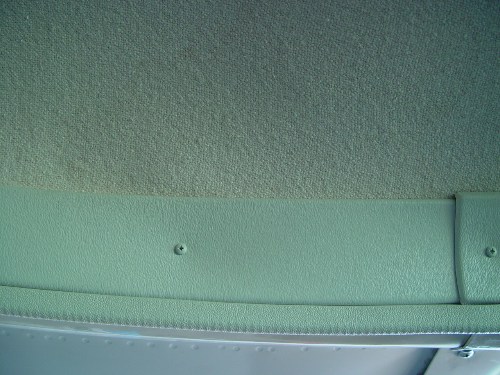
- Overhead tubing is CAT rather than SCAT, issue with waterproofing. May be the cause of slight water stains on headliner.

Resolve before flight home
- Screw missing on left side of lower console plastic overlay, can catch a shoe or the rudder during operation. Add a screw to pull the overlay in.

Resolve soon
- Clean and paint the trim tab, rusty on bottom and under stab spar
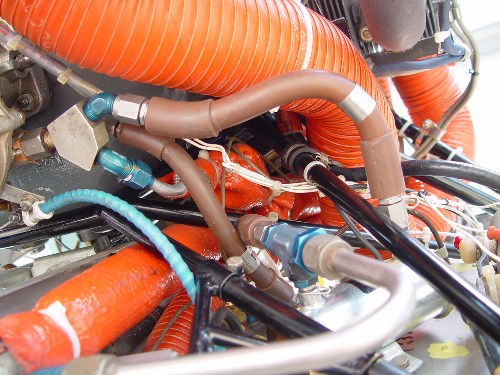
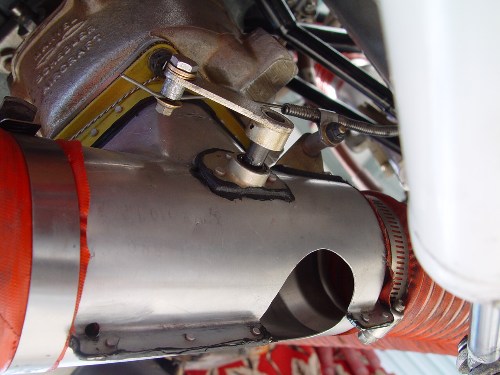
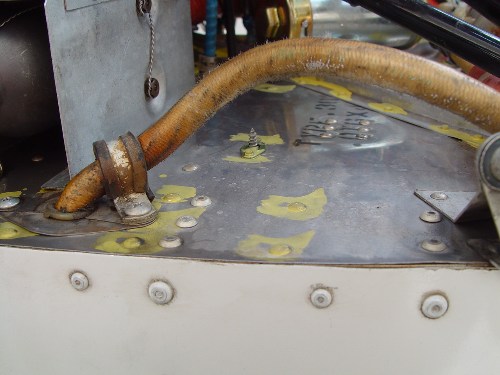
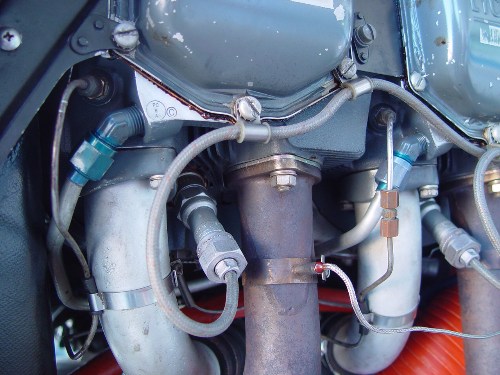
- Add silicon wear bumper / pad to induction tube where it can impact cowl
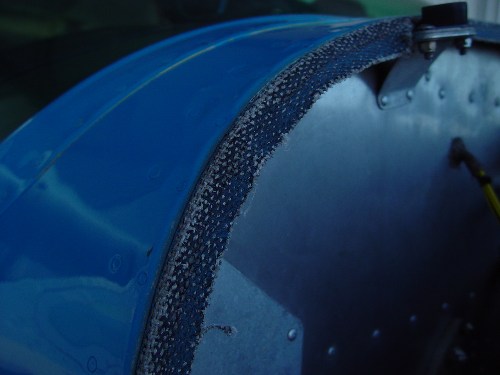
- Add additional aluminum tape where baffle seal is wearing through
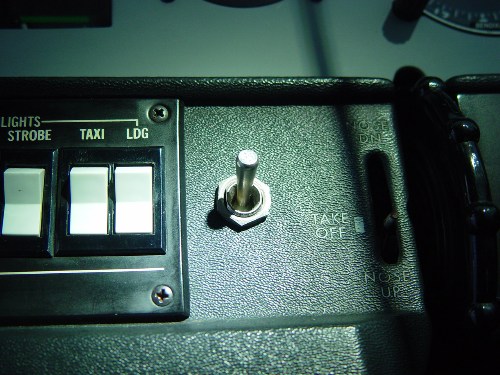
- Add a placard / label to the avionics power switch
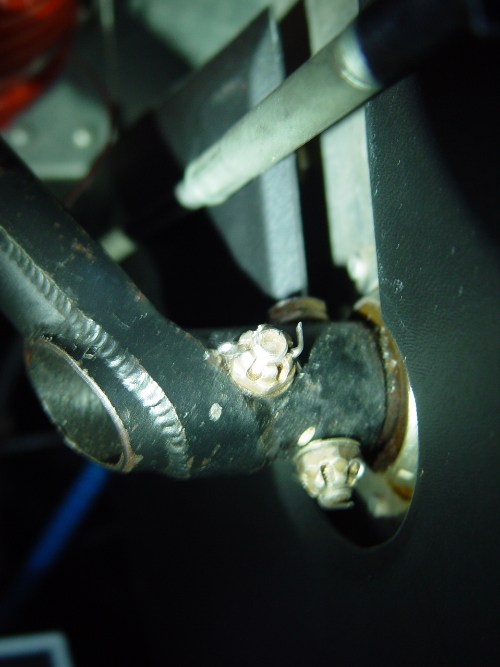
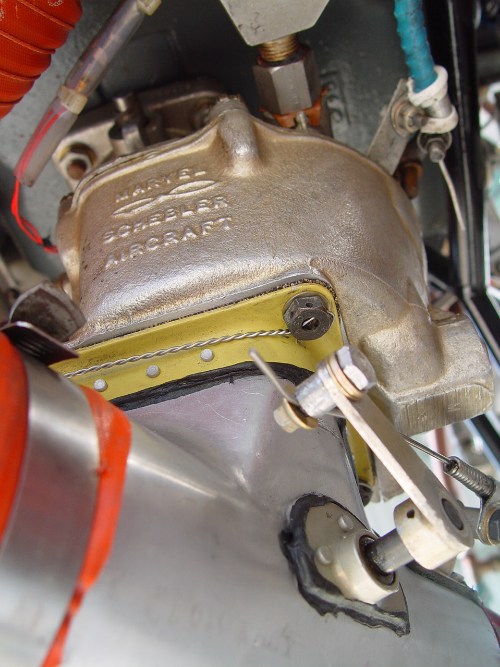
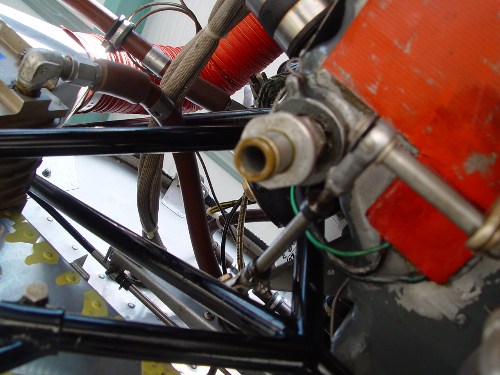
- Add a soft copper safety wire to the fuel shutoff cable
- Properly fasten carb heat Scat to reduce wear on tubing ends

Issues for next Annual
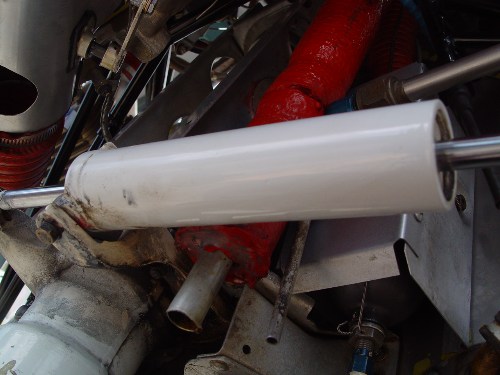
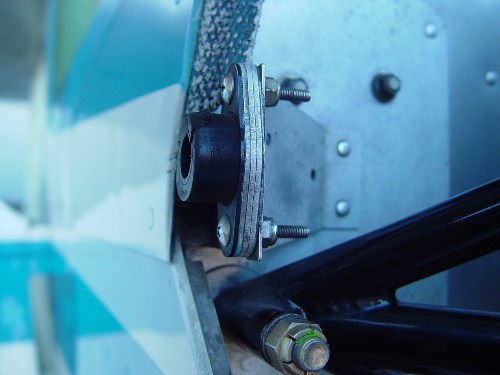
- Shimmy dampener should have placard referencing fluid requirement
- Consider adding a clear vacuum line filter to protect airframe in case of vacuum pump failure.
- Clean out bird nest and seal off internal lightening holes on stabilator to keep out birds.
- Re-seal wing shoulder fairings with sill seal or felt/white grease.
- Review right door interference with door frame, resolve with new door seals or possible trimming of door flange to provide clearance.
- It's probably about time for re-application of Corrosion X or ACF-50 anti-corrosion treatment.
- Battery drain tube is old and cracking, should be replaced.
- Clean floor around battery with soda water to neutralize effects of acid on the aluminum
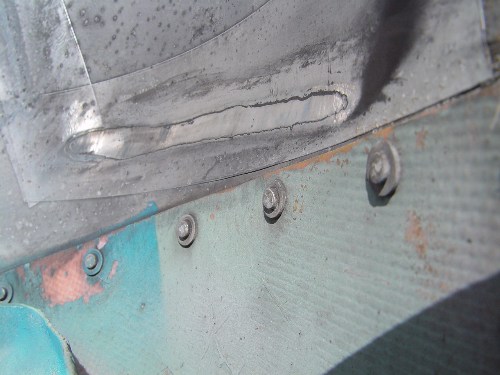
- Keep watch on the huck bolts, should not need any work for years but you'll want to know
- Replace steel screws in rudder cap with stainless
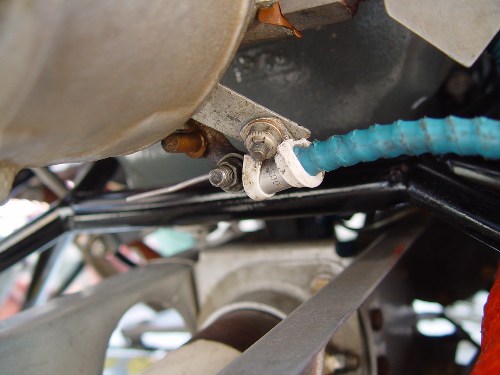
- Review clearance on mixture control (blue cable) and perhaps increase slightly.

Resolve Later
- Consider other options on cowl fasteners to improve alignment
- Cowl nose screws are the wrong type, should have a very short shoulder to avoid wearing the grommets.
- Keep an eye on the door seals, consider replacement and proper installation of seals if needed to reduce cabin noise from air leakage
- Consider replacing cowl seal material with non-fabric version to reduce wear on cowl. Not urgent as long as you have aluminum tape in place to capture wear
- Watch cowl flap hinge for loose pin, if the pin slips insert a larger pin with a bend and safety wire in place
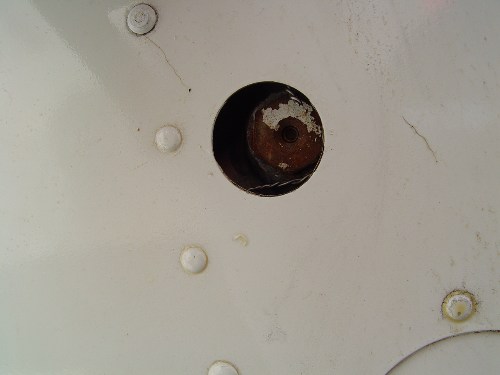
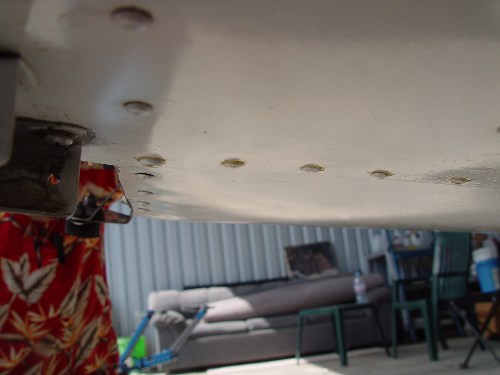
- Consider replacing the belly drain: current one is rusty. May be alignment issue
- Watch fuel flow for signs of mechanical pump backflow resulting in error (shows more flow than actual.) You may wish to re-plumb the fuel lines to resolve this
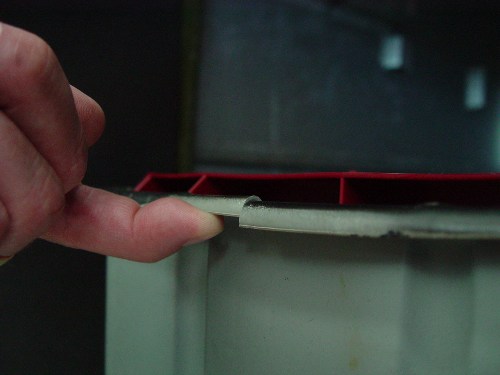
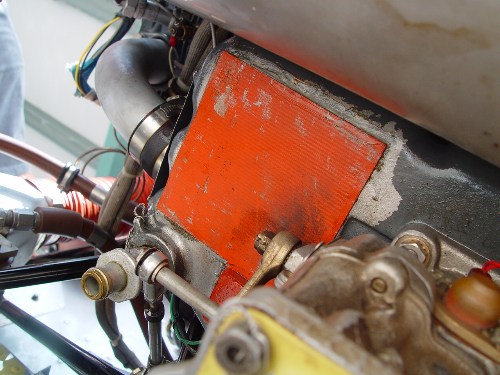
- Watch battery box, cracked along edge, may be good to reinforce before further cracking
- Watch boot cowl baffle seal wear, it will need to be replaced within a few years

Items of Interest
- Door seals are installed upside down: wrong edge glued to doorframe
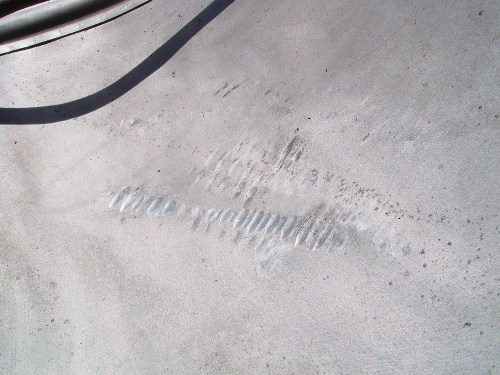
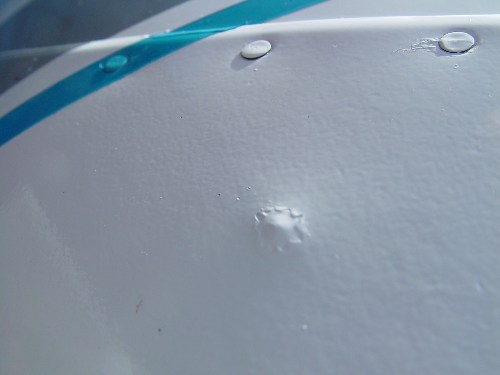
- There are a few small dents at various locations on the airframe
- There are a very few hail dents in the airframe
- It appears there are no hubcaps, not too serious of an issue unless you're planning to operate in a lot of mud
- Slight wrinkle on right outside tip of aileron
+ The wheels have been upgraded to two piece Cleveland wheels.
+ Lower cowl nose bowl has a filled lower lip, unusual
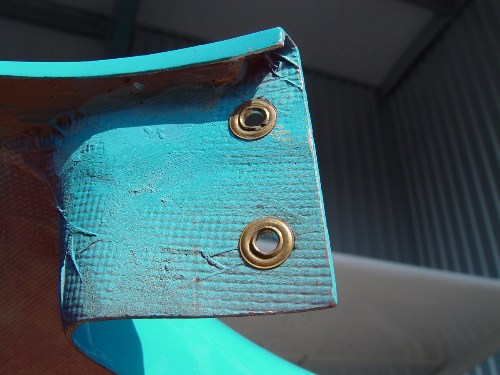
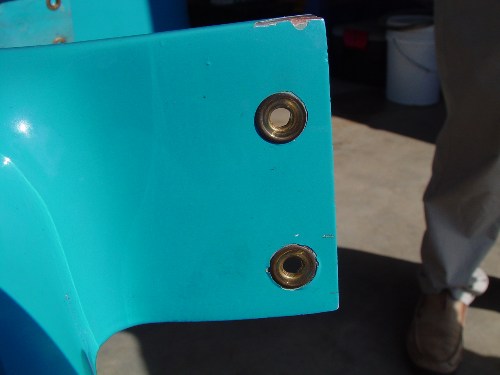
+ Fresh grommets in nose bowl
+ Engine has an oil pan heater
+ Air vents are upgraded metal style
+ Aircraft has a 4 cylinder primer system
+ Steel stabilator brackets already installed

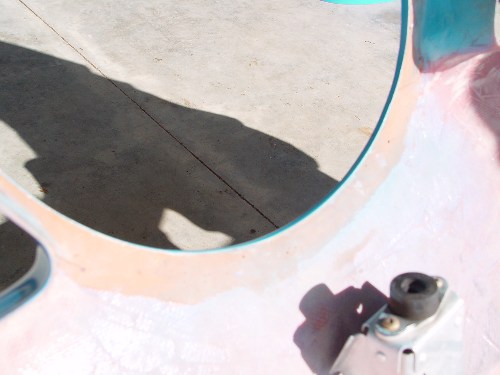
The images below reinforce many of the line items above and provide examples of other details. Click on any image to load a larger version.


Airworthiness issues:

Value impacting issues:

Resolve before flight home:

Resolve in the near future:

Resolve at Annual:

Resolve at a later time:

Items of general interest:
a_wyatt_32.jpg

Wear is clearly seen on the seat rails.
a_wyatt_33.jpg

Measurement with the tool shows that the wear is beyond limits for the AD. No cracks were found, but the hole wear is enough to make these rails unairworthy.

a_wyatt_36.jpg

The carb heat intake screen is broken with loose bits in danger of breaking off and being pulled into the induction system.
a_wyatt_37.jpg

The flap follower cable can be seen in this image, about in the center, as a white teflon inner lining with a spiral wrapper of stainless steel wires. The loss of the outer sheath means this cable can change length at will, resulting in uncertain flap movement.

b_wyatt_38.jpg

The overhead vent tubing is visible through the spar carrythrough holes, black color indicates it is CAT rather than SCAT and thus is not waterproof.

b_wyatt_39.jpg

This picture shows the debris on the lower flange of the spar carrythough. There was no sign of significant pitting, but the material is not protected with zinc chromate so it is at risk for pitting at a later time.

b_wyatt_40.jpg

A closeup of the spar carrythrough web section shows no signs of corrosion. All indications are that it's only a little dirty and a cleaning and treatment will make it last an indefinite period.
b_wyatt_41.jpg

A slight water stain on the headliner over the pilot's left shoulder was first noted by the purchasers. This may indicate a lead in the wing shoulder fairing or water leaking from the air vent CAT tubing. Replacement of the tubing is a good first step and should be fairly easily done while the headliner is removed to address the spar carrythrough issue.

f_wyatt_42.jpg

The plastic overlay on the left side of the console is missing a screw which should be holding it in contact with the center console. This may allow it to either hook the foot of the pilot or potentially the rudder pedal.

This issue is made more complicated by the installation of a control cable (it appears to be the mixture cable) through a lightening hole out the side of the console. Ideally this cable would be re-routed to allow the overlay to lay flat on the console.

g_wyatt_01.jpg

Wear marks on the lower cowl show contact with the induction SCAT tubing. It should be held up, and/or padded with a softer, flatter baffle seal material to reduce wear on the lower cowl.

g_wyatt_02.jpg

Wear points along the lower cowl front edge should be protected with aluminum tape.
g_wyatt_10.jpg

Existing tape has worn through in places and should be replaced. In time the wear may be reduced by replacing the baffle seal material, which has an embedded fabric, with a type which does not contain the fabric. This will create less friction on the cowl surface.
g_wyatt_43.jpg

The avionics master switch is unmarked. It should be pretty easy to have an escutcheon plate added with proper markings.
g_wyatt_44.jpg

Fuel shutoff valve is supposed to be safetied with a soft copper wire, enough to keep the control from being accidentally pulled.

n_wyatt_17.jpg

The lower side of the stabilator trim rod is rusty, should be removed, cleaned and painted. I think you have a much better image of this issue, sorry this one turned out fuzzy for some reason.
n_wyatt_18.jpg

The screws on the rudder cap were steel and are starting to show some rust. Should be replaced to avoid staining the rudder cap in time.
n_wyatt_19.jpg

The shimmy dampener should have it's official placard to help mechanics remember to service with only the properly volume of fluid. Even then you'll want to carefully monitor anyone who touches the dampener in any way as they are likely to not read the placard, resulting in a very expensive explosive failure of this part.
n_wyatt_27.jpg
27

The mixture cable appears to be rigged such that there is very little extra motion in the cable. A small adjustment should help this a lot, although it may require a modification to the bracket to get the proper spacing.
n_wyatt_31.jpg

A number of acid splashes were observed in the tailcone. These should be washed down with soda water to neutralize the acid
n_wyatt_46.jpg

Wear was noticed on the door frame. Over time this may get deep enough to require replacement of this skin. To avoid that adjustments should be made in the door deal and/or door frame to eliminate the contact point.

n_wyatt_47.jpg

This image shows the corresponding wear on the door frame.


A shot of the bird nest in the stabilator
t_wyatt_03.jpg

The hinge pin is staked rather than safety wired. This may be an acceptable solution in some applications, but due to engine vibration most I've seen have been safety wired. It should be watched and at any indication of the wire wearing and exiting the hinge, a new wire installed and safety wired in place.

t_wyatt_04.jpg

No cracks in this location, just a scratch.
t_wyatt_09.jpg

Interesting wear point, or missing inner skin. I've not seen this before, just something to keep an eye on over time.

t_wyatt_23.jpg

The belly drain looks pretty rust and will be a problem should it start leaking. However replacement is hampered by a poor alignment with the access hole. It probably deserves some work in the shop before it becomes a bigger issue on the field one day.
t_wyatt_25.jpg

The fuel lines to the carburetor are plumbed such that any backflow through the boost pump will bypass the fuel flow sensor. That's OK as long as the pump doesn't backflow. If it does, another solution is to re-plum so all fuel runs through the sensor.

t_wyatt_28.jpg

The bottom of one of the solenoids is a little rusty, just something to be aware of. It may be good to clean and paint this to stop further rust.
t_wyatt_30.jpg

Battery box lid has a crack, this could be reinforced with some fiberglas.

t_wyatt_48.jpg

The boot cowl baffle seal is showing some age, will likely need to be replaced at some point. It is a squeezed rivet process, not too big of a project other than wishing it had been done before the paint.
x_wyatt_05.jpg


Nice to see the lower cowl lip filled in with bonding material to increase strength.
x_wyatt_06.jpg

Fresh grommets on the nose bowl, nice to see
x_wyatt_07.jpg

and here's the outside of those grommets

x_wyatt_08.jpg

One little dent on the cowl, something pushed or dropped from the inside.
x_wyatt_11.jpg

The top of the trim tab actuator rod is also showing some rust, should be cleaned and painted (as mentioned above)

x_wyatt_12.jpg

The steel stabilator brackets can be seen from the tailcone. That's a project you won't have to deal with later!
x_wyatt_13.jpg

Stab scuff strip involved, this will help save your stab when operating off grass or especially gravel.
x_wyatt_14.jpg

Factory handles, useful for moving the aircraft around.
x_wyatt_15.jpg

Note a couple of samples of the little dents, there were just a few but showed that somewhere in the past someone was a little careless with overflexing the skin panels.
x_wyatt_16.jpg

Here is one of the hail dents, there were just a few on the airframe.
x_wyatt_20.jpg

Very nice carob heat air box, with a fresh and well attached flange. There is a lot of money invested in this part, good to have a new one.

x_wyatt_21.jpg

Another view of the very nice carob heat box.
x_wyatt_22.jpg

The firewall has been repaired, as we know, note the larger and pulled-type rivets along the bottom edge.

x_wyatt_24.jpg

More signs of the repair some years ago, it seemed well done with just a few tucks.
x_wyatt_26.jpg

The oil pan has a plug-in engine heater.

x_wyatt_29.jpg

Good to see a quick-drain on the engine for oil changes.
x_wyatt_34.jpg

Up-graded air vents, front and rear.

x_wyatt_35.jpg

There was a wrinkle on the right aileron at the rear. This could possible be straightened somewhat by a talented metal person.
x_wyatt_45.jpg

Extra tubing shows it has a 4 port primer system, which will help make cold weather starting easier.

x_wyatt_49.jpg

Two details here: there were several long bolts used, probably not too bad a thing but they may start to catch on hoses and wires at some point. Usually it's best to have 3 threads showing. Also this lord mount takes a beating from cowl installation and is starting to show a little wear.

boro_11

A picture of the huck bolts, no issues with these.
x_wyatt_50.jpg

Looking at the valves, they look good.
x_wyatt_51.jpg

Seats are clean and show good contact points around the circumference.
x_wyatt_52.jpg

A clean contact point is visible part way up the seat, lots of wear left.

x_wyatt_53.jpg

No signs of internal cracking between valve seats.
x_wyatt_54.jpg

Good contact point on the valve.

x_wyatt_55.jpg

All four cylinders were inspected and all were found to be clean and in good shape.
x_wyatt_56.jpg

Here we're looking at the cylinder walls. A general overall look was taken first, with no issues found. The next three close-ups show that the crosshatch is looking good, there is no reason these will not break in well.

x_wyatt_57.jpg

x_wyatt_58.jpg


A2
3687